
How to create a Connector?
How to Set Up a Connector in the OpenPath Admin Portal
Follow these steps to set up a Connector in the OpenPath Admin Portal:
1. Log In
- Go to https://client.openpath.io/.
- Enter your username and password.
- Click Sign In.
2. Navigate to the Connector Section
- On the left-hand menu, select Connector.
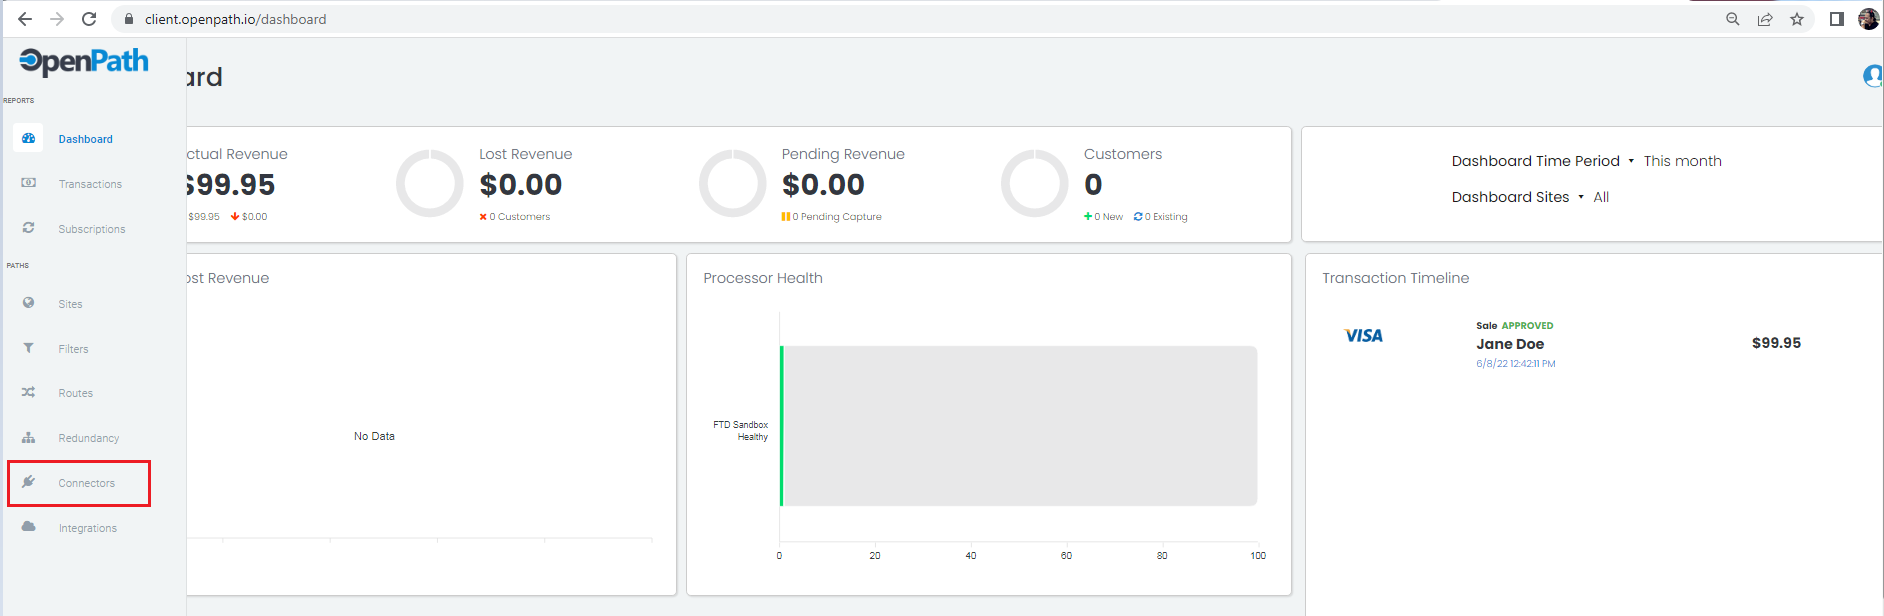
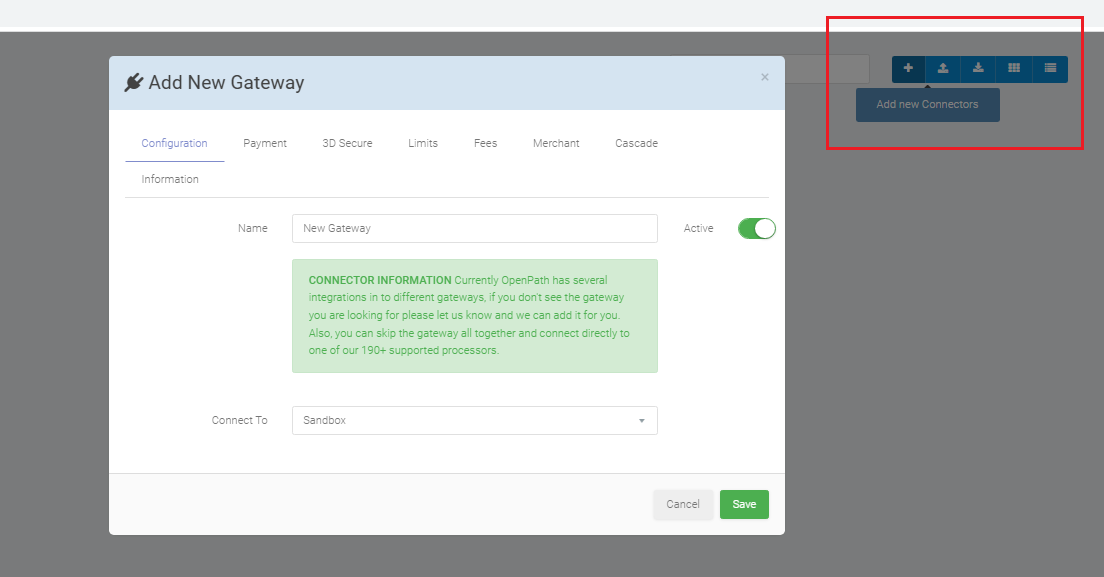
3. Add a New Connector
- Click the Plus "+" sign to create a new Connector.
- The "Add New Gateway" window will appear.
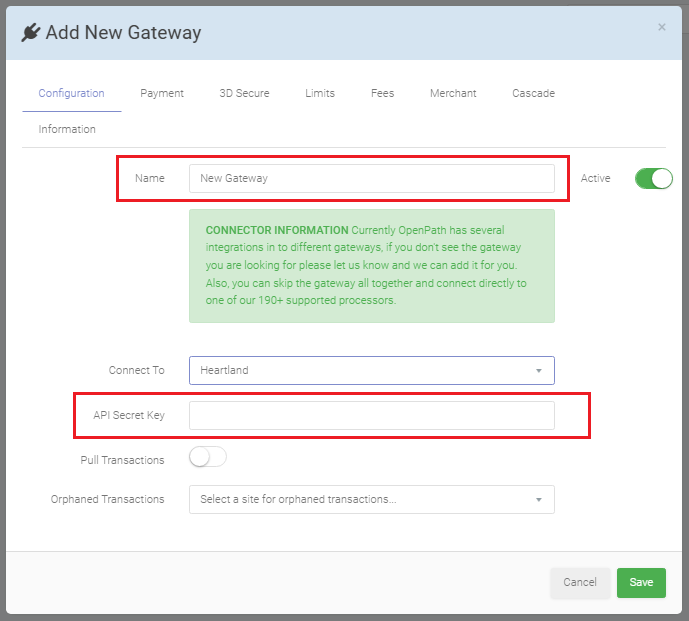
4. Configure the Connector
- In the Configurations tab:
- Rename the Connector, if desired.
- Select the Payment Gateway you want to connect to from the dropdown menu (e.g., Heartland in this example).
- Paste the API Secret Key into the designated field.
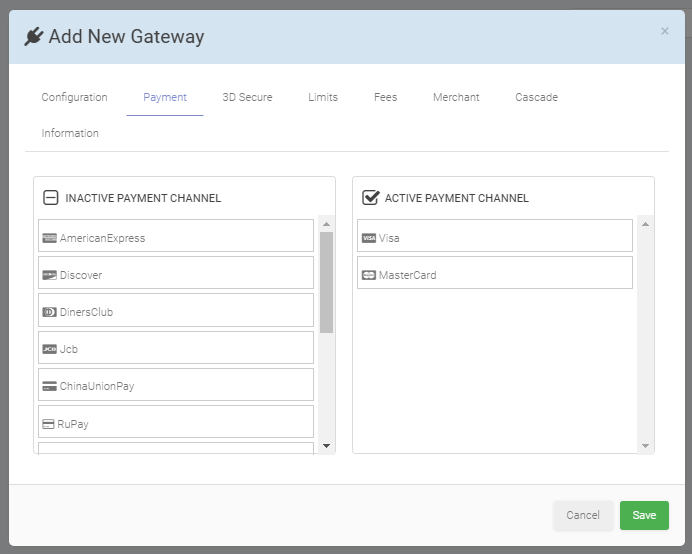
5. Set Up Payment Channels
- In the Payments tab:
- Drag and drop the relevant Payment Channels from the inactive list to the active list.
Example: Enable Visa and Mastercard.
- Drag and drop the relevant Payment Channels from the inactive list to the active list.
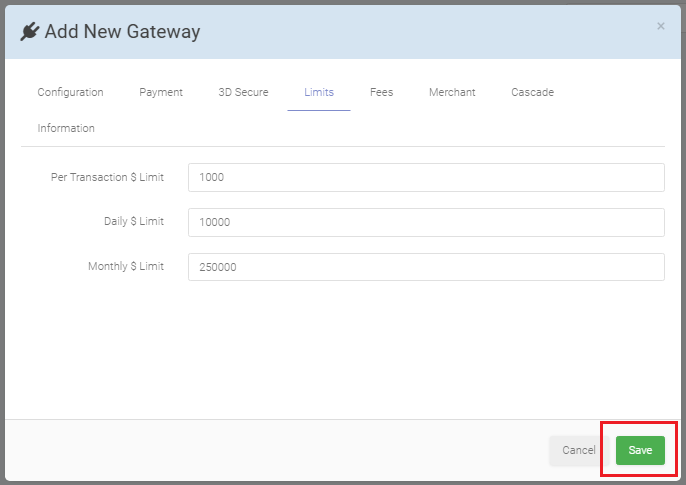
6. Adjust Ticket Limits
- In the Limits tab:
- Review the default Ticket Limits.
- Modify them as needed for your organization’s requirements.
- Click Save to finalize the setup.
Congratulations!
You have successfully created a new Connector in the OpenPath Admin Portal. Your system is now ready to process payments using the selected gateway.